How To Edit Your Podcast
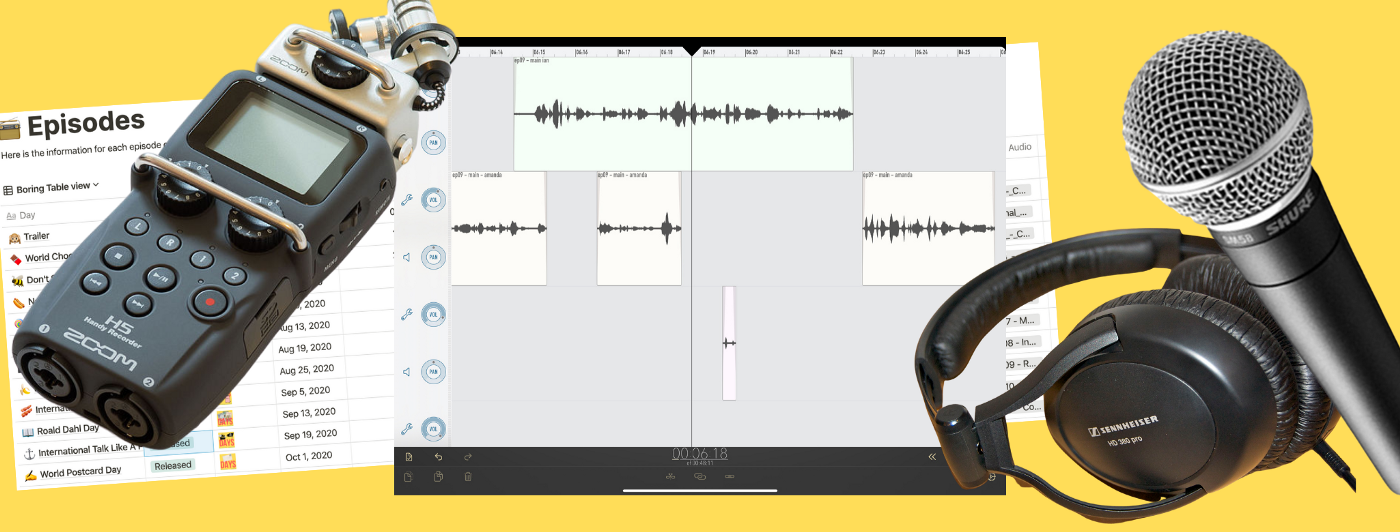
Each podcast is different, but here’s what you’ll want to consider when you’re thinking about editing.
Everybody who has a podcast has to deal with the task of editing. This may range from simply trimming the start and finish of a single audio clip through to performing a detailed edit on multiple audio channels where you are removing or rearranging parts of the audio.
Each podcast is different. What follows below is the process that I use for Days, my podcast with Amanda Danells-Bewley. You should not see it as a process to be followed rigidly but instead, think of it as a starting point from which you can build your own process.
As podcasts go, Days is reasonably simple. It’s a conversation between two or three people, each of whom is recorded on a separate audio track.
The goals of editing
Editing is the process of taking raw materials in the form of audio files and making them into a finished podcast episode.
I find it useful to think about these objectives when I sit down to edit, as they drive the activities that I perform, and contribute to the (sometimes considerable) length of my editing process. If you’re editing your own podcast, you should be thinking about what your version of these are, and maybe even go to the length of writing it down.
You might find yourself needing to add one around music or other non-spoken audio clips. I don’t need to think about those, as Days doesn’t have them!
1. Produce a great episode
My overall editing objective is to produce an episode that does not appear to a casual listener to have been edited. It should be interesting, flow naturally and contain nothing to distract the listener’s attention from the content.
2. Remove digressions & off-topic meanderings
I remove parts of the conversation that have strayed away from the main topic or have gone down a rabbit hole into too much detail.
3. Prioritise answers over questions
Our philosophy is that the interview part of the episode should be all about the guest, and so I limit how much airtime Amanda and I get in the interview section of each episode.
4. Keep episode length down
It’s a bit arbitrary, but I aim to keep episodes under 45 minutes. Every podcast has its own view of this, but that’s where I’ve drawn the line up to now. If we’ve done a great interview with few digressions and meanderings, then it can be challenging to find the “least best” segments to cut.
You can find online some opinions on “ideal lengths” for podcasts, that correspond to average commuting times. I’m not sure about these — I listen to podcasts ranging from 5 minutes to 3 hours in length and am not at all dissatisfied with them. The most important thing is that you show consideration for your listeners, and respect their time.
5. Moderate the disfluencies
Hesitation disfluencies are the false starts, repetitions, and hesitations that accompany the words that we are actually trying to say. Sounds such as “umm” and “err” fall into this category. Remove too many of them, and the conversation sounds unnatural, however, leave them all in, and they become a distraction to listeners. I remove some of them in my editing, especially where it is easy to do it undetectably.
6. Provide a great audio experience
Finally, there is an “audio engineering” aspect to any great podcast experience. Dealing with this involves managing background noise, and employing audio processing such as compression, EQ and levels management. I don’t spend tremendously long on these things, but they can add a nice polish to the overall sound quality.
Software
There are many available audio editing tools, both free and paid. I often recommend Ferrite Recording Studio, which I use on my iPad. Other good tools are Adobe Audition which is more expensive or Audacity, which is open source and consequently free. Each of these tools strikes a balance between providing powerful features and being easy to use. I think that Ferrite has nailed this balance, and there’s something great about being able to drag audio clips around with your fingers.
If you’re new to audio editing, you can try any of the above software packages for free, so you should experiment. You’ll invest quite a bit of time in getting good (and fast!) at using whatever tool you select, so it is worth spending time to ensure that it’s the right one for you.
Some people also use Digital Audio Workstation (DAW) software designed for music production such as GarageBand or Logic Pro X from Apple, or Ableton Live or any number of others. My experience of using these for podcast editing is mixed. They have a strong orientation towards music production which means that they are cluttered with many features and tools which aren’t useful for podcasters. Further, it can be hard to configure some of them away from the musical concepts of beats and bars to a simple timeline based on minutes and seconds.
Your mileage may vary, and if you are very experienced with one of these tools, then that may be the one for you. However, for most people, one of Ferrite (if you have an iPad), Audition or Audacity is probably the best starting point.
The raw materials
We usually get together to record Days, and I use a Zoom H5 audio recorder to make the recordings. I can plug my phone in to record a remote guest or, with the optional EXH-6 “input capsule” plugged into the top of the H5, add another dynamic microphone if the guest is present in person. We have also used Zencastrwhen we’ve had COVID-19 restrictions to deal with, which has worked well.
Either way, Amanda and I are recorded on a track each, and our guest, if there is one, is recorded on a third track.
I usually make several recordings — a longer one with the guest interview on it, and then shorter ones with just Amanda and I for the intro and outro segments. Consequently, we might end up with 7 files in total:
Amanda — Interview
Ian — Interview
Guest — Interview
Amanda — Intro
Ian — Intro
Amanda — Outro
Ian — Outro
Sometimes we combine these in various ways, but there are rarely fewer than 5 files to take forward into the edit.
The stages of editing
When editing, I perform the following main tasks:
1. Assemble the audio
Firstly, I bring all the audio together in Ferrite Recording Studio.
I create a new project in Ferrite and place all the audio clips in it. Each participant has a track with their audio clips in it. I trim the clips to remove any chat from before or after the main business of the recording. If the clips need lining up, which they usually don’t as I generally record on a single device, I do this too.
After performing this step, my project looks something like this:
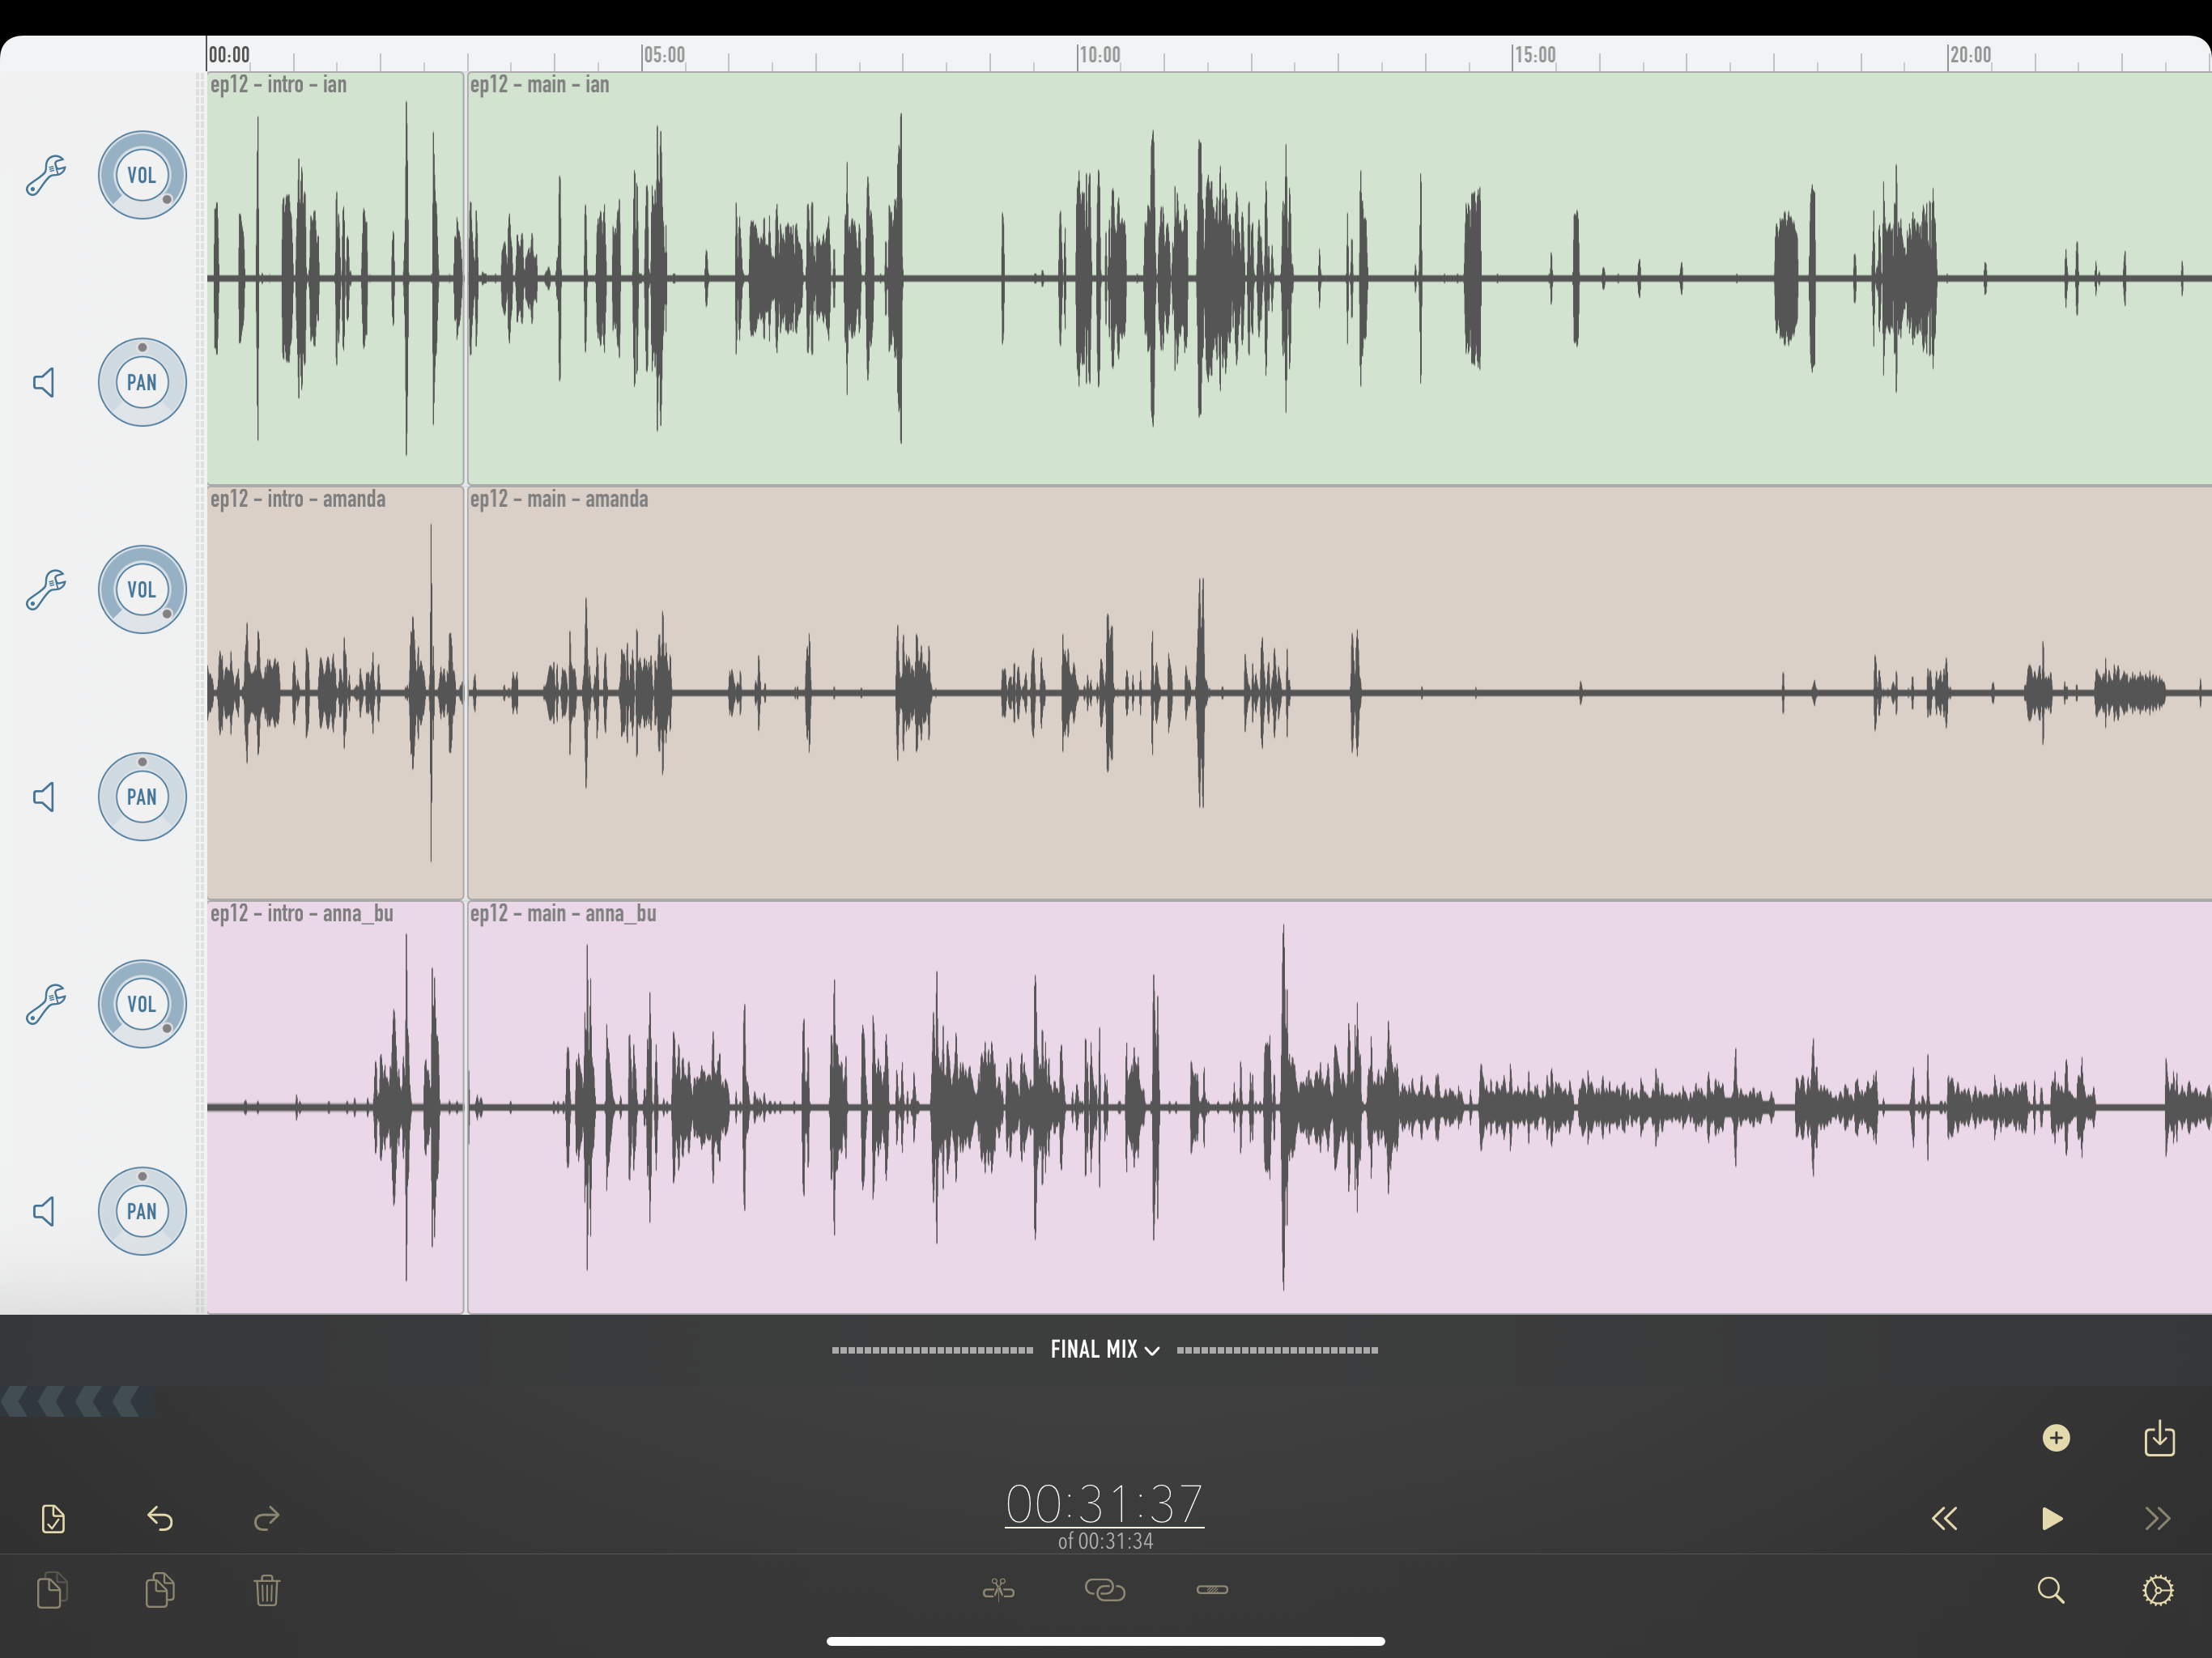
I can export this version if required, to allow both us and our guests to hear the unedited version of the podcast.
2. Strip Silence
Strip silence is the process of removing all the audio from each participant’s recorded track where that participant is not speaking or making any other intentional sound. The idea is to remove all the segments where there is just background noise, leaving pure silence on the track.
This is a feature of many audio editing tools, although it isn’t always called “strip silence”. For example, in Audacity, it is called “Truncate Silence”.
Performing this step has some really significant benefits. In fact, editing a podcast would be much more difficult without it. Firstly, the overall sound quality is greatly improved by removing from the mix the background sound of all the tracks where nobody is speaking. Secondly, once the parts of the audio that contain actual content have been isolated, they are much easier to edit.
Here is a screenshot depicting Ferrite Recording Studio’s Strip Silence feature.
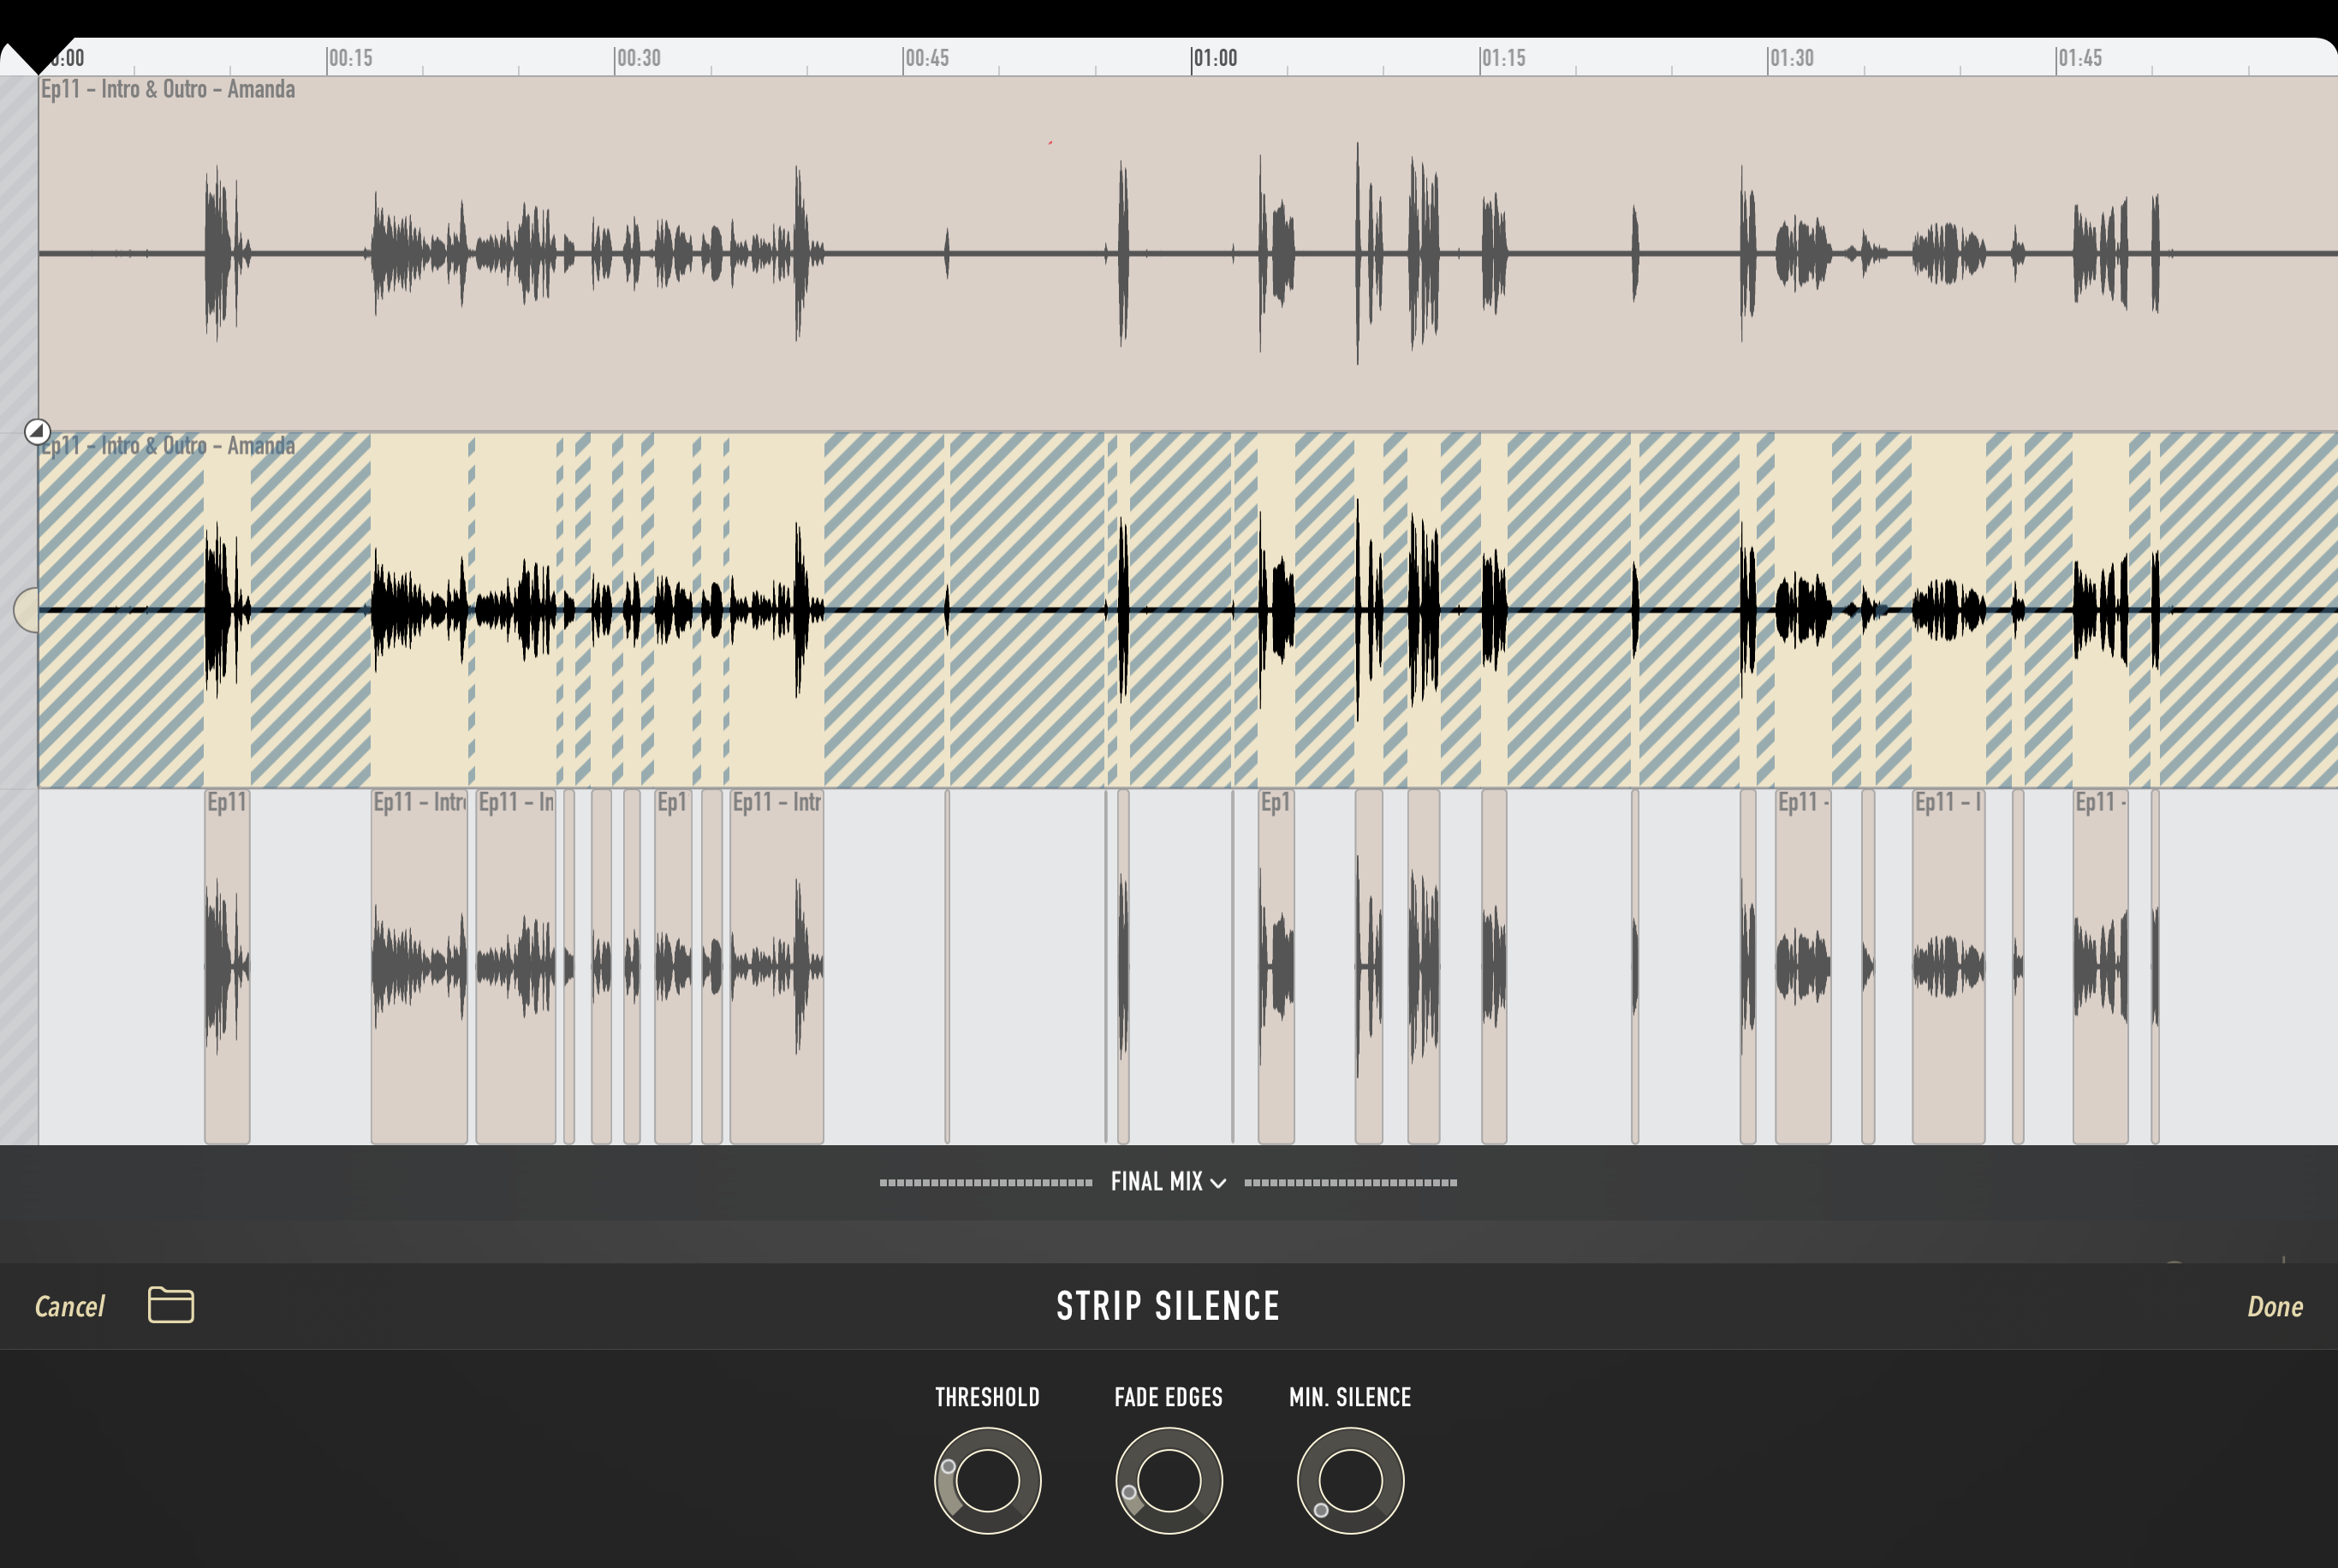
You can see the same audio clip repeated here on three different tracks. The first (top) track is the original WAV file from the recorder. The second track shows the Strip Silence process being performed. The third track shows the result of performing the Strip Silence.
At the bottom of the screen, the controls for Strip Silence can be seen. The hatched areas on the second track indicate which portions of the clip will be removed with the controls at their current settings. Again, other editing tools will have equivalents of these.
Most important is the “Threshold” control, which specifies a level below which sounds are considered to be silence. To get the desired results, this must be set above the level of the background sound of the person’s environment but below the level of their quietest speech. The parts of the audio clip that will be removed by the current settings of the controls are displayed as a hatched pattern.
The below screenshot illustrates two different threshold levels applied to the same clip.
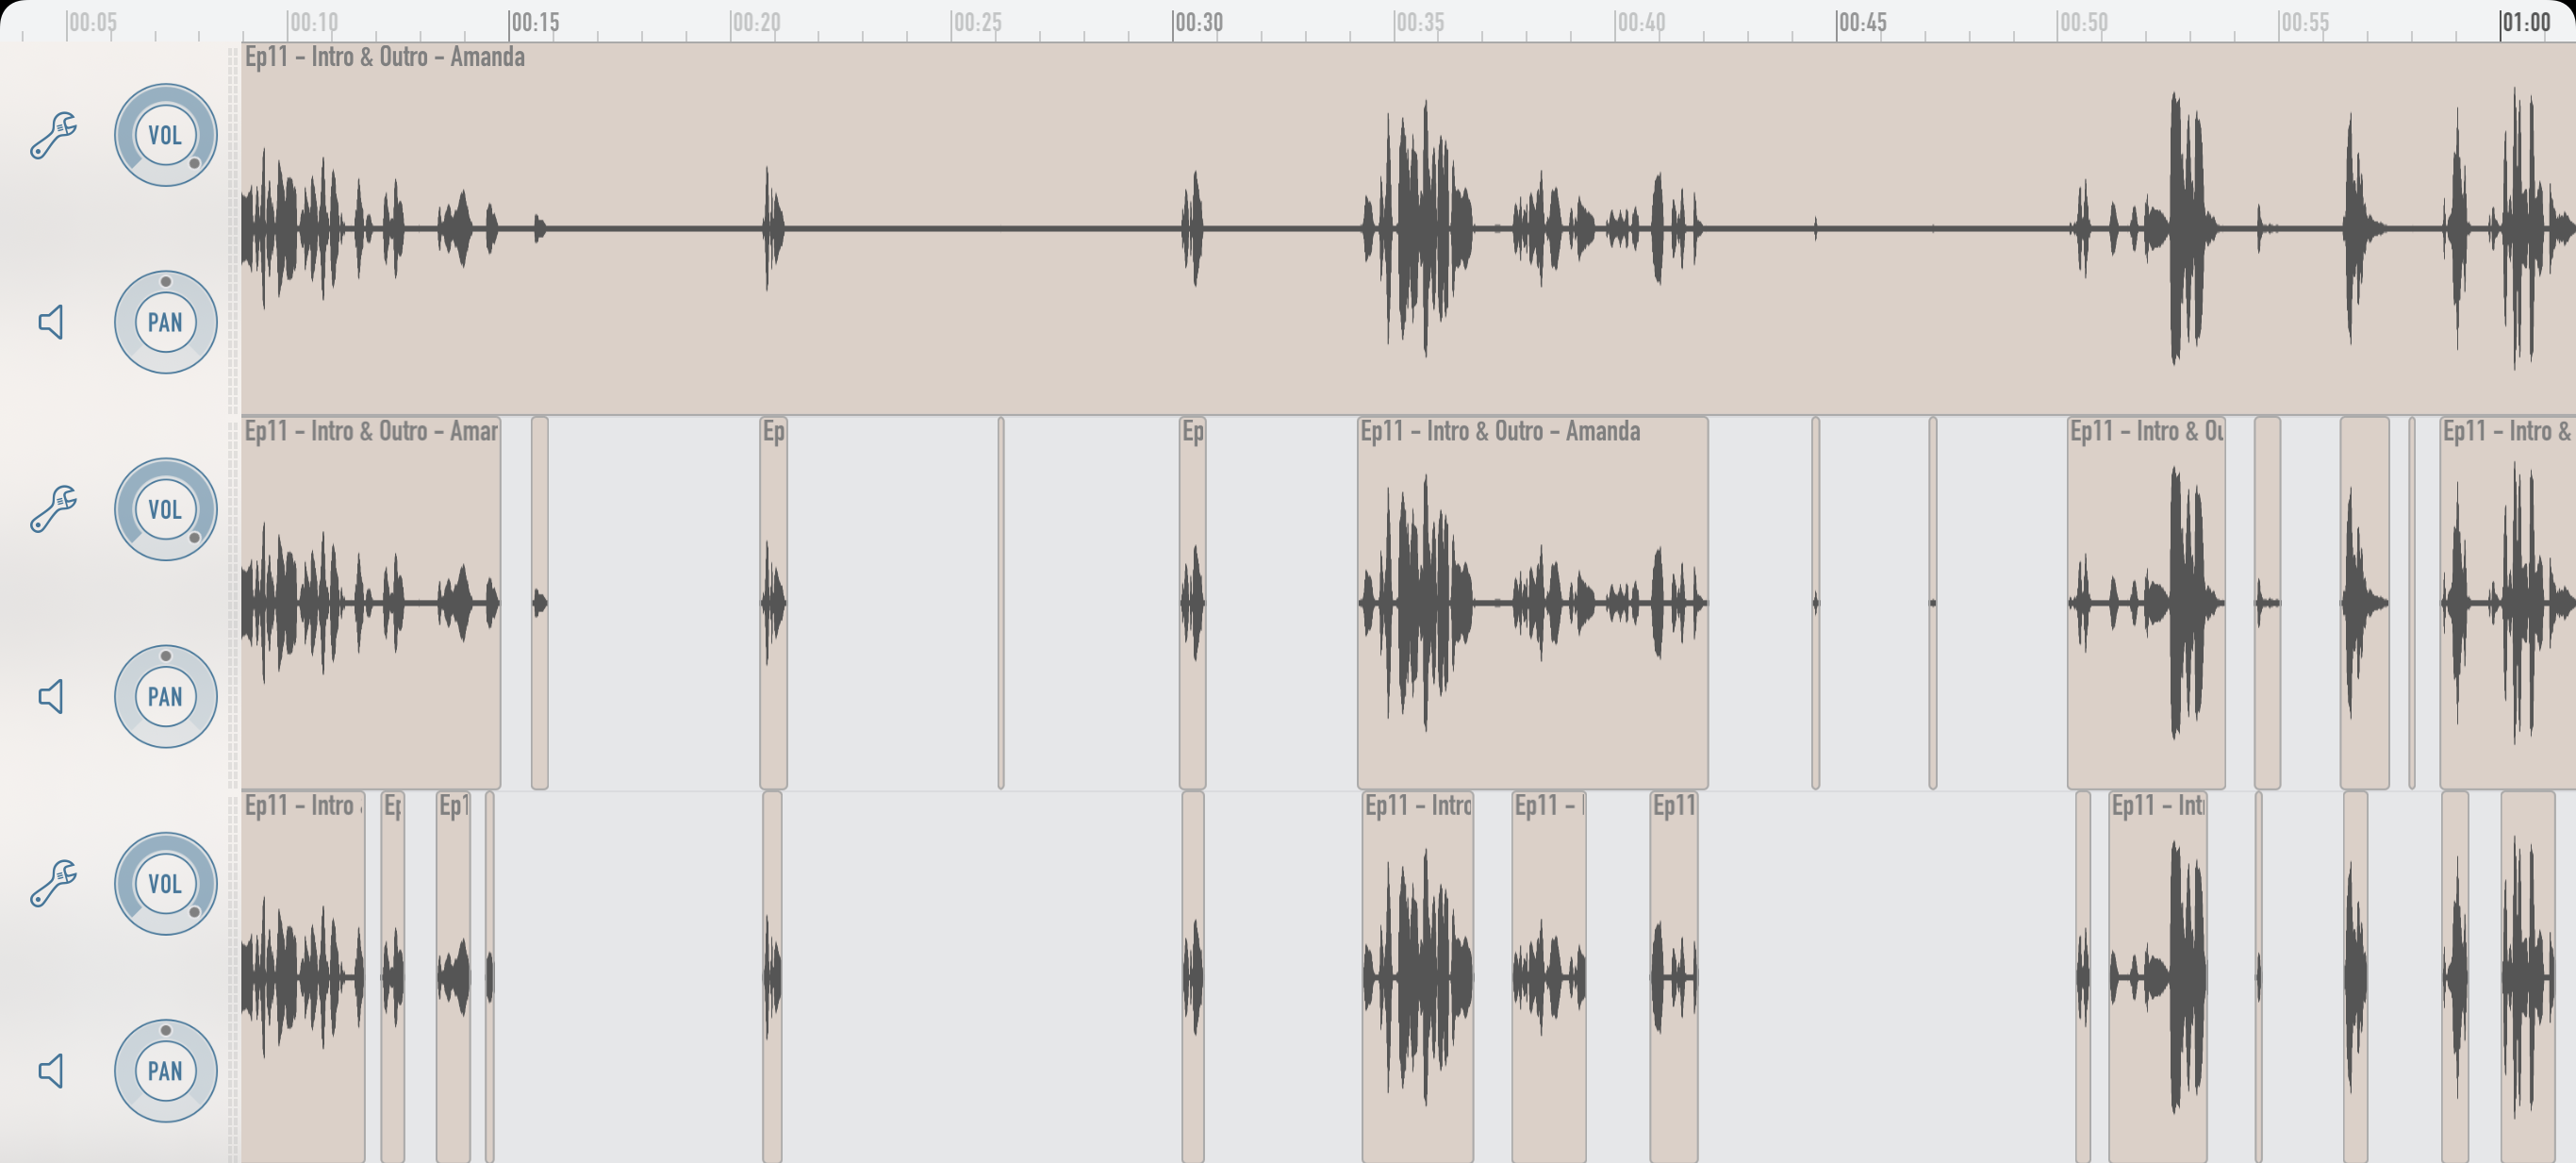
Again, the first track shows the unprocessed clip. The second clip has had Strip Silence applied with a low threshold. In fact, this was the lowest threshold that I could use that removed anything at all from the clip. The third track has been stripped using a higher threshold. You can see that this has removed quite a few sounds that are present in the second track. Some of these are “good” removals of background sounds. Examples of these can be seen between 00:44 and 00:47. However, this threshold setting has also removed some required sounds, including the ends of some words. There is an example of this at 00:42, where the process has clipped a part of a word that you can see is present in the other two tracks.
As Amanda and I are usually in the same place for recordings, there is usually some bleed-through of her voice into my microphone and vice versa. I try to ensure that Strip Silence is set to remove sections where this is happening.
It is better, though, to have the threshold too low and to strip too little. That might leave some clips that must be manually trimmed, and others that must be deleted entirely. However, if too much is stripped, then I will have to listen carefully for trimmed words that need restoring, and some desirable sounds may be lost entirely.
Strip Silence is an invaluable tool but must be used with care.
3. First Pass Edit
During this step, I listen to all the audio and “tidy it up”. By this I mean that I do the following:
Fix any problems resulting from the “strip silence” process. These are usually either unwanted background sounds that are too loud to have been automatically removed or cases where audio has been wrongly removed, often from the end of a word. For example, an ‘s’ at the end of a word may have been spoken quietly enough to have been trimmed.
Remove any obviously incorrect sections of audio. For example, we might have done something wrong and re-recorded it straight away. I remove the incorrect version during the first pass edit. If there’s any question about it, I will leave it in for now.
Remove some of the hesitation disfluencies. I remove some “umms” and “errs”, and other unintentional sounds made by the participants. There’s a balance to strike here, but the objective is to make everyone sound as good as possible and to avoid the attention of listeners being distracted from the content of what’s being said.
Shorten the pauses. Sometimes while speaking, the participants will pause for thought or some other reason. I often shorten these pauses and find that this on its own can make the overall podcast a minute or two shorter. I would advise never to eliminate them, however, as this would make your conversation sound unnatural. Apply this technique judiciously, and use your ears to judge the result.
It is necessary to point out that I spend time in this stage fixing bits of audio that are subsequently removed in the second pass edit. This doesn’t seem very efficient; however, I find that if I don’t fix these things, then it influences the review process, where we decide which parts to keep in, and which to discard.
4. Review
This is the first point where I get other people to listen to the episode. The two principal reviewers are Amanda (of course) and my wife, Paula. I also listen through myself.
The most important comments that come from this stage of the process are those that highlight areas that could be significantly cut. Examples of review comments might be:
You’re going on too long, just cut to the question
or
Too much detail, remove most of this answer
Getting other people to listen and provide honest feedback on the episode at this stage is very helpful in keeping the podcast snappy and interesting. If you are doing this yourself, then consider leaving it a couple of days after your first pass edit before you listen back. This will help to create some distance that will help you to notice the things that need to be cut back, or that need some polishing.
I use Dropbox to share the mp3 file of the edit with the reviewers and to capture all our comments. Dropbox has a feature to allow listeners to a media file to add time-based comments. You can see an example of this below.
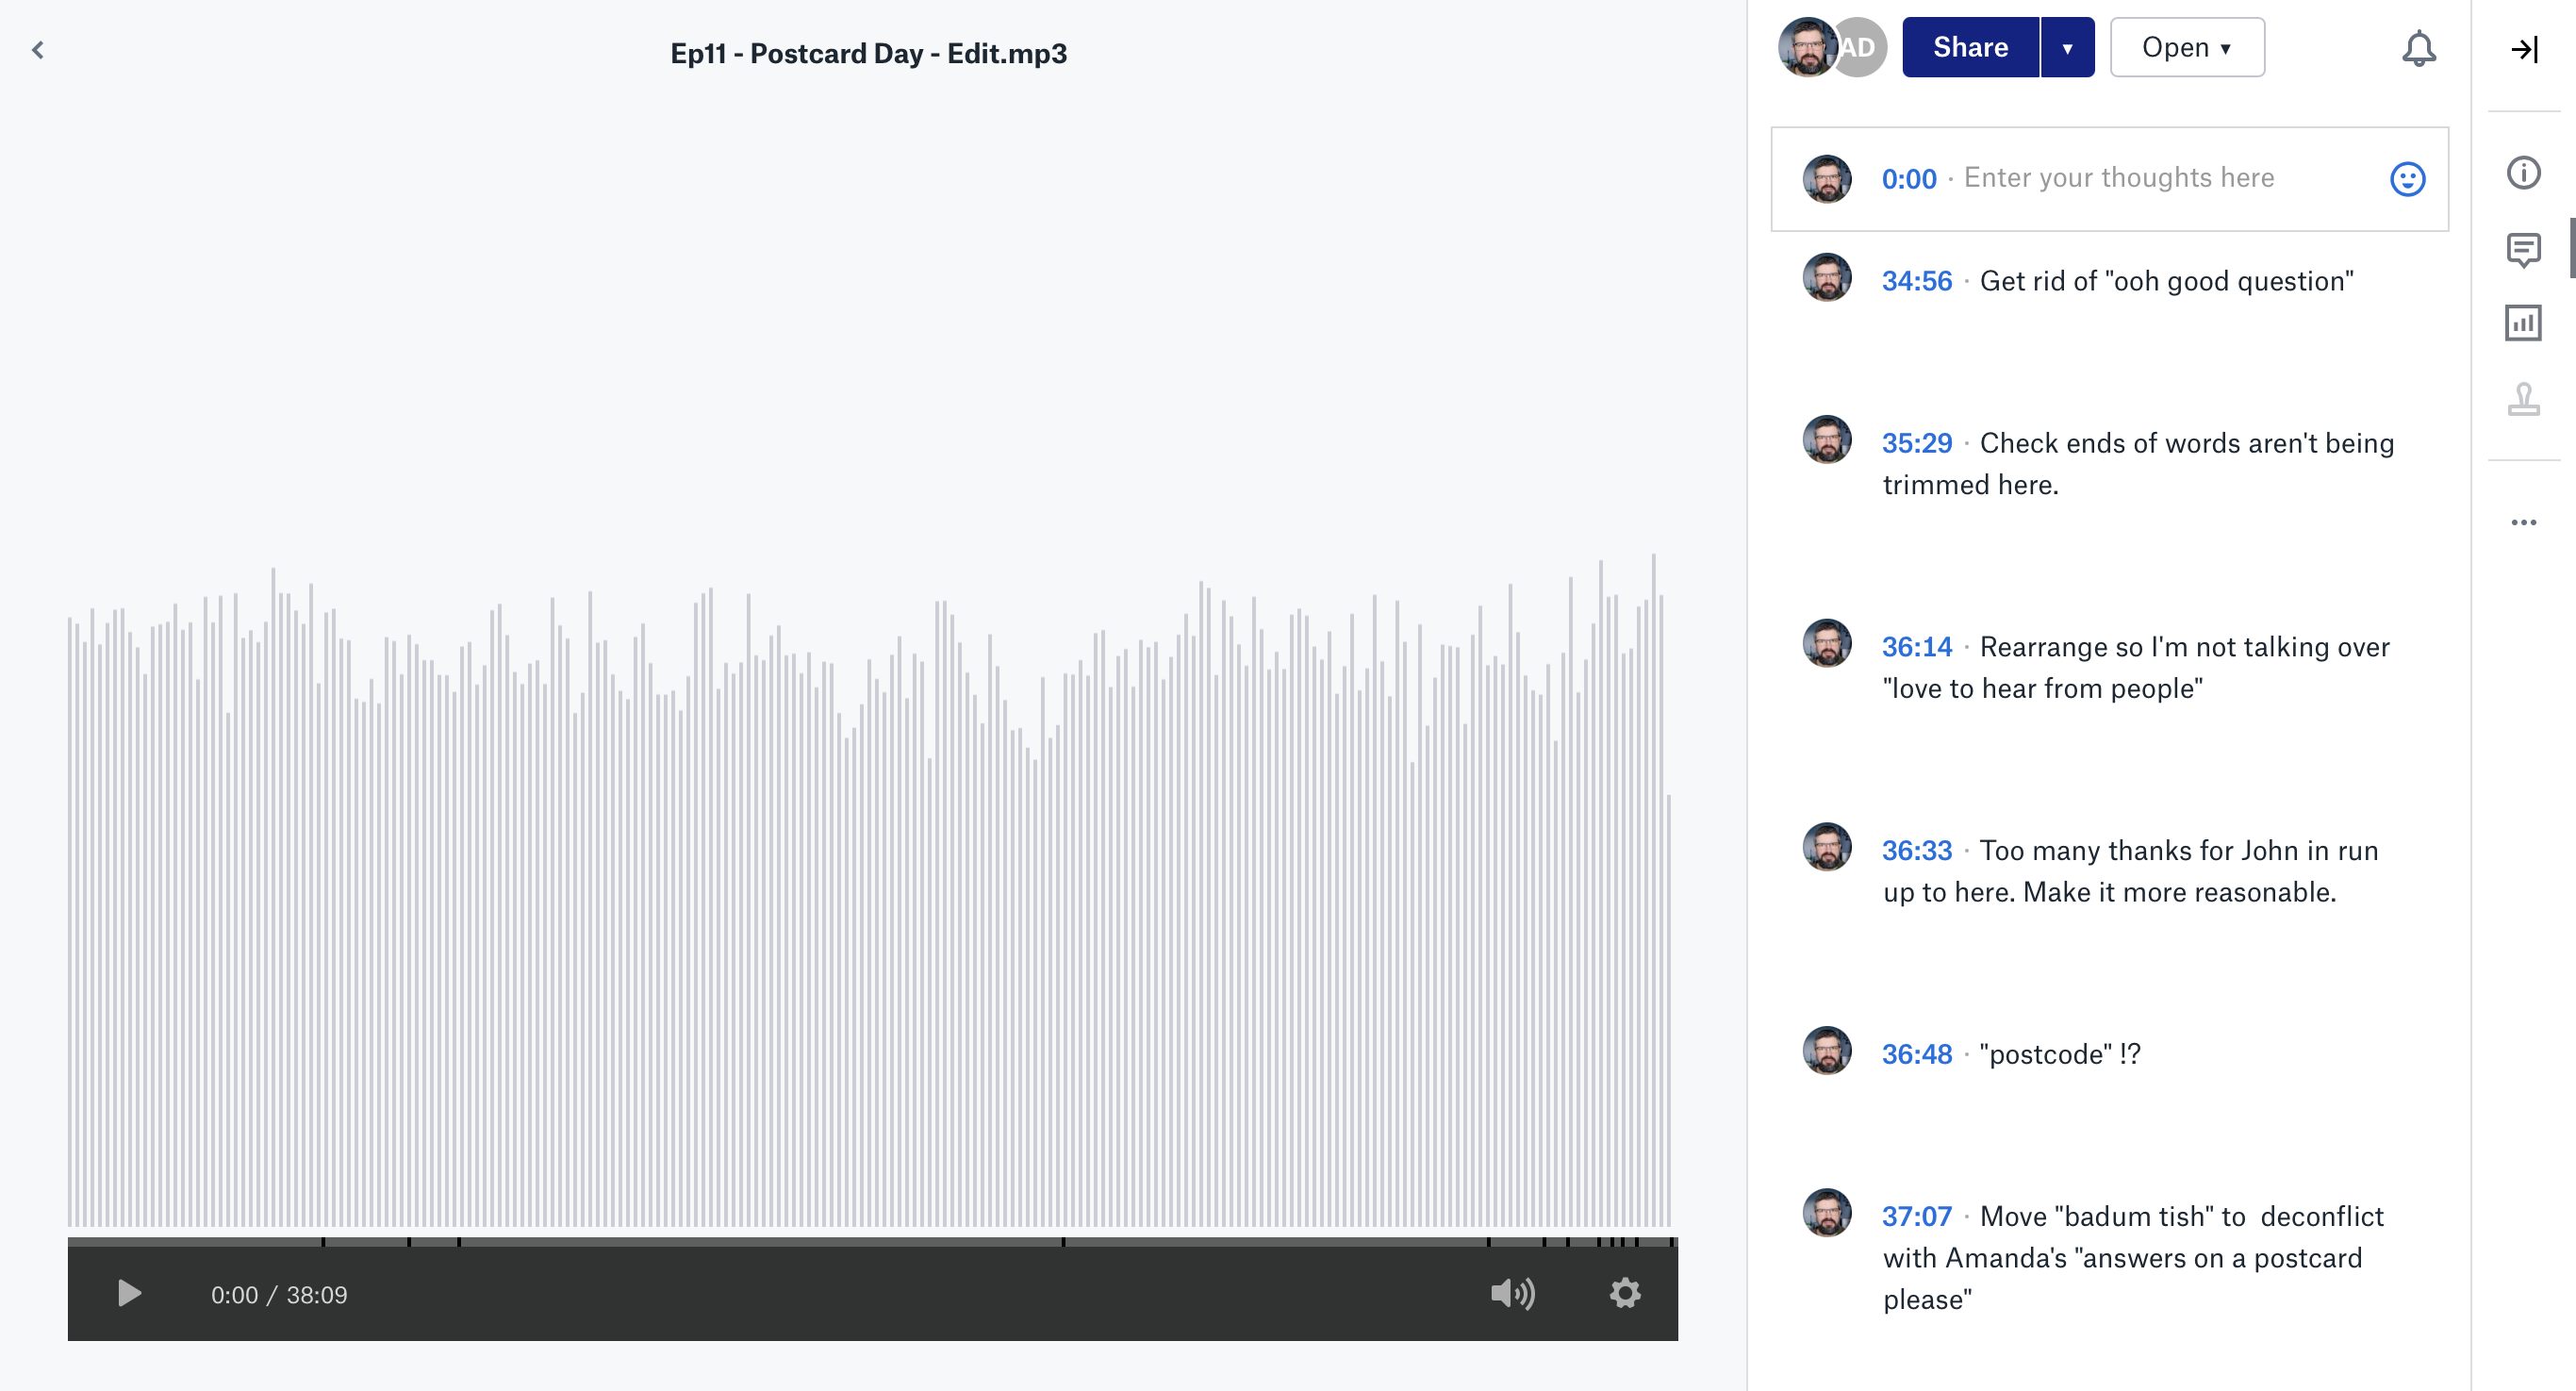
Once I’ve made my comments and collected comments from the other reviewers, I can begin my second pass edit.
5. Second Pass Edit
This edit brings the episode very close to its final releasable state. I make most of the big editing decisions about what to keep and what to cut during this stage. The review comments are an excellent starting point for this, but I have to make the final judgment as I am responsible for coherency and consistency. For example, if a participant references a previous part of the conversation, I need to make sure that I haven’t cut it so that listeners know what is being referred to.
My general approach to the second pass edit is to work backwards through the review comments.
The reason for this direction of travel is that when I make a change, it affects the timing of everything after it. For example, if I removed a 30-second segment at the 4-minute mark, something that was previously at 4:45 would now be found at 4:15. Working backwards through the review comments means that the timings specified in the comments will remain correct throughout the second pass edit, which makes it a lot easier!
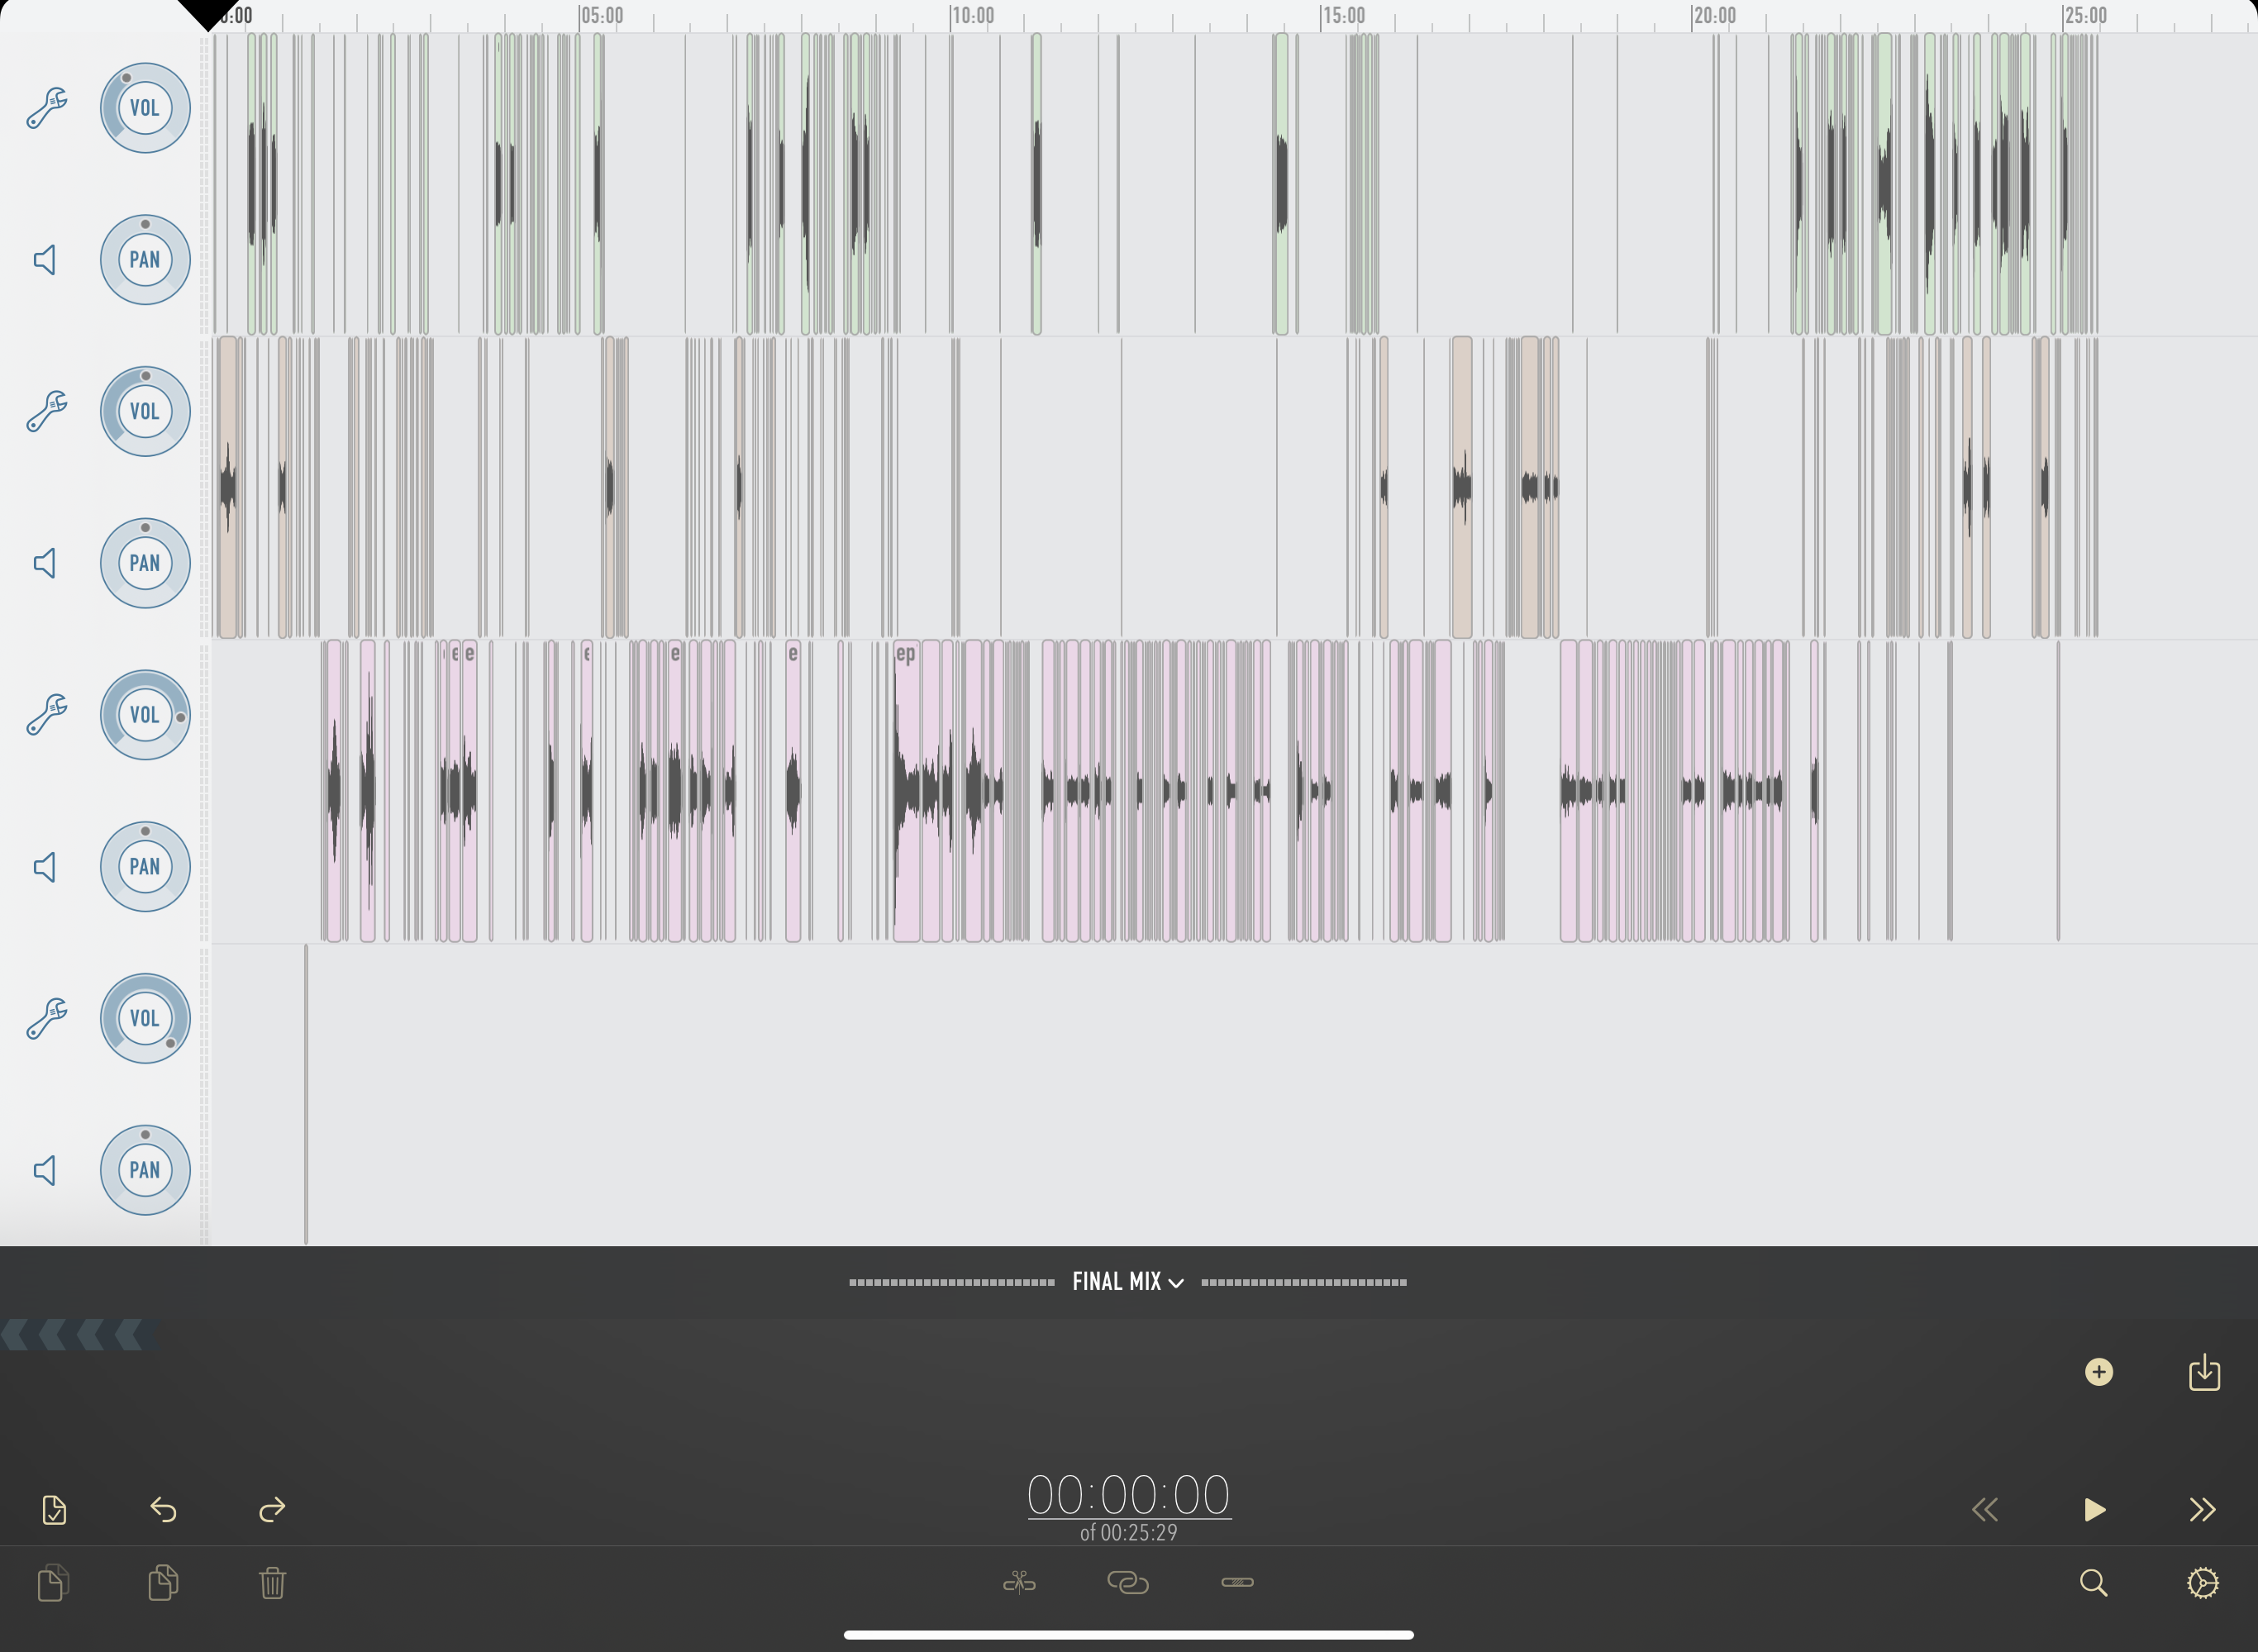
Once I’m done, I try to provide at least some verbal feedback to the reviewers — especially if I’ve done something different to what they suggested. Doing this conveys appreciation for their time in performing the review, and shows that you have taken on board what they said.
6. Audio Engineering
This final stage of the editing process is where I consider the more technical stuff. This is a huge rabbit hole into which you can disappear without a trace. My advice is to avoid getting too bogged down in it all. Perfect is the enemy of good — stop fiddling when it’s good enough, and don’t hold out for perfection. Trust your ears — if it sounds fine to you, it’s probably OK.
There is a huge raft of plugins and audio processing tools that you can use to improve how your audio sounds. A few examples of these are noise gates, compressors, equalisers (EQ), de-noisers, limiters, loudness meters, and there are many more. Which of them you need and what you need to do with them will depend on how you do the recording, and manage background noise, recording levels, etc. There are whole books that could be and have been written on the subject of how to use these tools. It would not be realistic for me to attempt to explain them all here.
The most important of these are probably compression and EQ, and I use Ferrite’s built-in compressor and EQ on each track. One approach that I have used is to start from the default settings, or load a likely sounding preset (e.g. “Voiceover”), and then adjust to taste using my ears to judge the results. If you try this, then be sure to compare the sound of the track both with and without the processing to sense-check that you’ve actually made things better.
The good news is that there are plenty of articles online where you can learn more about how to EQ and compress your podcast. It is well worth getting into this, but not if it holds you up or delays your main goal of getting a podcast episode out there. Whatever you do, don’t let a quest for audio perfection stop you from releasing your episodes.
For the final mix, I trust Ferrite’s “auto-levelling” to produce something at the right loudness level, smoothing out any minor differences in the levels between the participants. So far, this has produced good results for me. Your tool of choice will most likely have an equivalent auto-levelling tool that you can test.
I like to do a listen-through of the final export, but don’t always have time. If I don’t have time for a full listen, I do a spot listen where I listen to a few seconds at 5–10 places in the file.
It’s definitely worth taking the time for a full listen the first couple of times, and also any time when you have made significant changes to your editing set-up or your settings.
And Then…
At this point, you “just” have to upload your podcast and get people to listen to it! Easy, right? No, of course not. Those are topics for another time, however.
For now, I hope that this has provided some useful ideas that you can bring into your editing process. Please respond below with your corrections, additions, and any cool editing tricks that you want to share.